You notice something looks off with your plant. The leaves are yellowing. The stems seem limp. Maybe it stopped growing weeks ago, and you are not sure whether to water it more, repot it, or just accept the loss.
Before you give up, take a breath. A plant that looks dead is not always dead. But a plant that is dying does send out very specific warning signals, and once you know what to look for, you can often bring it back.
This guide walks you through exactly how to tell if a plant is dead or just dying, how to test it the right way, and what to do to revive it step by step.
Is Your Plant Dead or Just Dormant?
One of the biggest mistakes gardeners make is throwing out a plant that was actually dormant, not dead. Many perennials, shrubs, and even some houseplants go through a dormant period, especially in winter or during prolonged dry spells, where they drop leaves, stop growing, and look completely lifeless.
The difference between dormancy and death comes down to what is happening inside the stems and roots. A dormant plant is resting. A dead plant has no living tissue left anywhere.
Here is the key test. Take your fingernail or a small knife and scratch a small area on the surface of a stem. If you see green or moist tissue underneath, the plant is alive. If you scratch further down and the stem is dry, brown, and crumbles, that section is dead. Keep testing lower sections because sometimes the base of the plant or the roots are still alive even when everything above looks finished.
You can also try the snap test. Gently bend a branch tip. A living branch bends and shows white or green inside if it does snap. A dead branch snaps off instantly, clean and dry with no moisture inside.
8 Signs a Plant is Dying or Already Dead
1. Yellowing or Browning Leaves
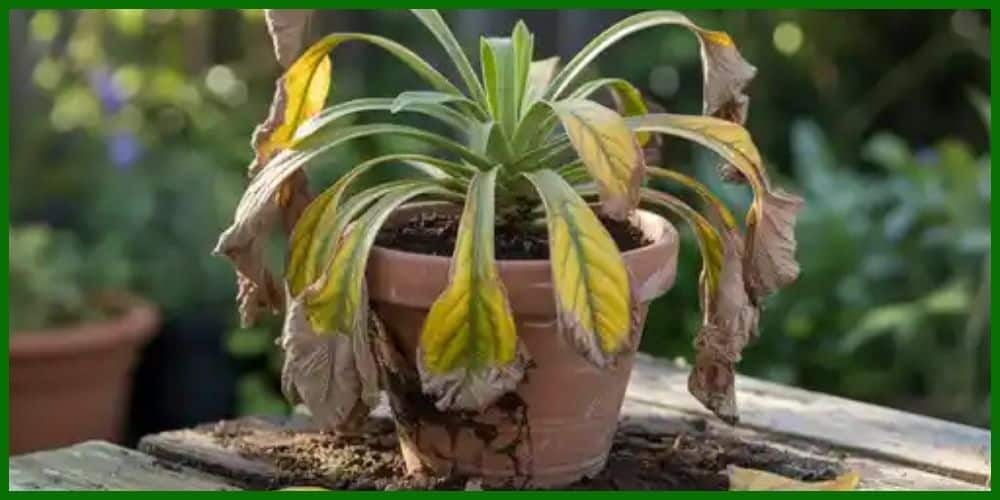
Leaf color change is usually the first warning sign. Yellowing typically points to a watering problem, either too much or too little, or a lack of nutrients. Brown and crispy leaves usually mean the plant is severely dehydrated or getting too much direct sun. If the browning is limited to the very tips, your plant may just need more humidity.
The key distinction: if only the lower or older leaves are yellowing while newer growth looks fine, it is often just natural leaf turnover or a mild nitrogen deficiency, not a dying plant.
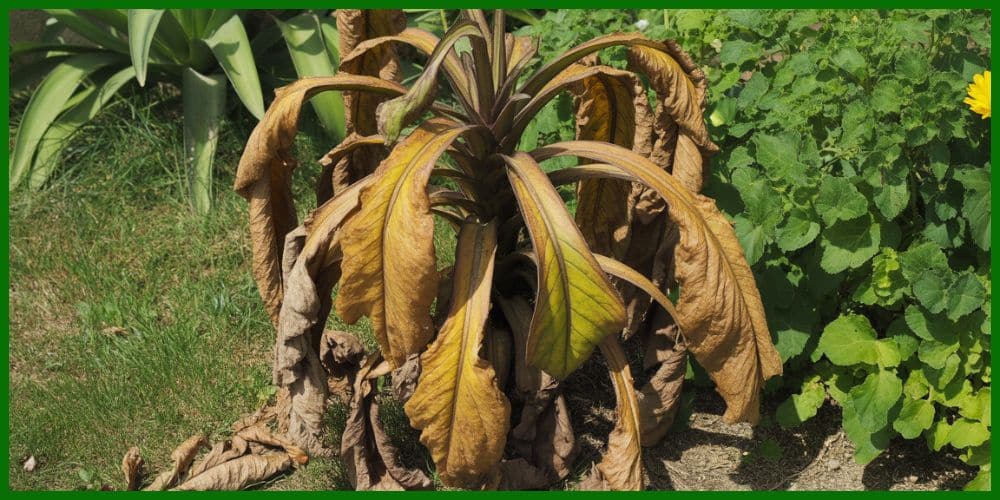
2. Wilting Stems and Drooping Leaves
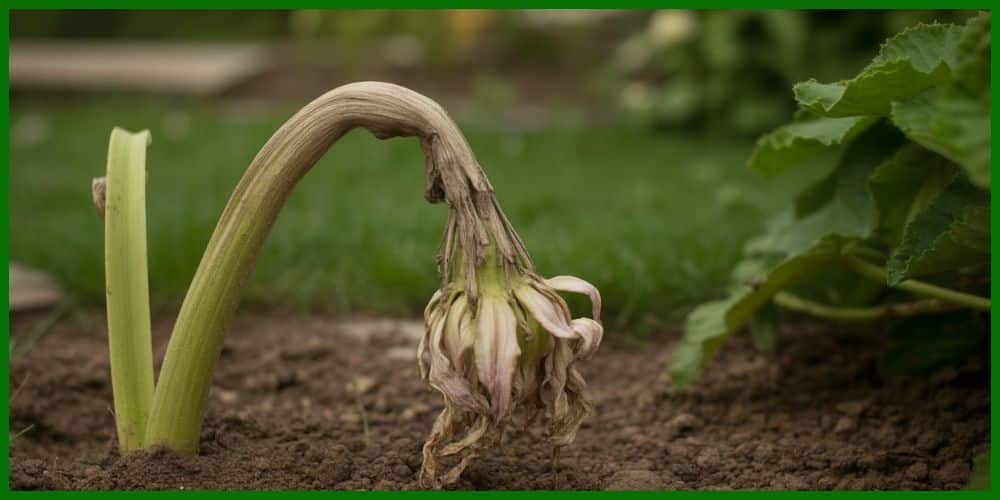
Wilting is the plant’s distress signal. When a plant wilts, it is telling you something is deeply off with its water balance. Underwatered plants tend to go limp all over and the soil will feel bone dry. Overwatered plants wilt too, but the soil will feel soggy and the stems may stay somewhat firm while leaves hang downward.
Mushy, soft, or slimy stems are a more serious sign and typically mean rot has already set in below the surface.
3. Dropping Leaves for No Clear Reason
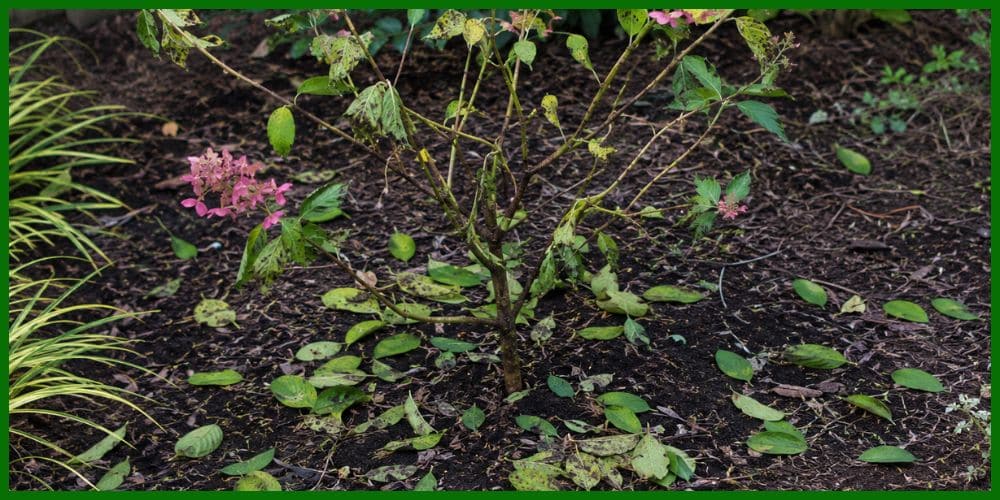
If leaves are falling off without turning yellow or brown first, look at three things immediately. Check whether the soil is waterlogged or completely dry. Check whether the roots are crowded or pot-bound. Check whether a sudden temperature change or cold draft is stressing the plant. Sudden leaf drop is the plant’s way of shedding weight when it can no longer sustain itself.
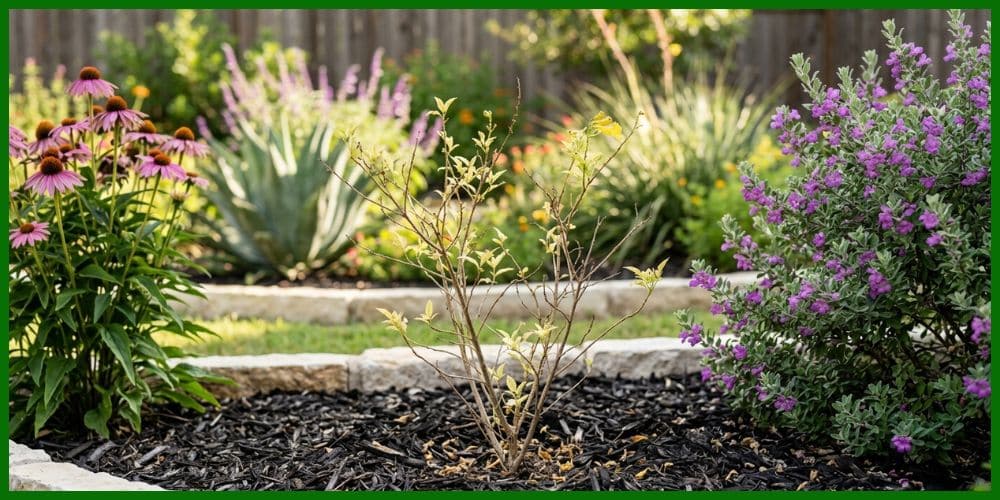
4. Dieback
Dieback is when the outer parts of the plant, the branch tips, leaf margins, or the ends of roots, start dying while the center may still have life. In trees and large shrubs, you will see clusters of completely bare, dry branches standing out from the rest of the foliage. In smaller plants, stems start dying from the tips downward. This can result from fungal disease, pest infestation, extreme weather, or severe drought.
Catching dieback early gives you the best chance of saving the plant. If only the tips are affected, prune back to live tissue immediately.
5. Spots, Powder, or Fuzz on the Leaves
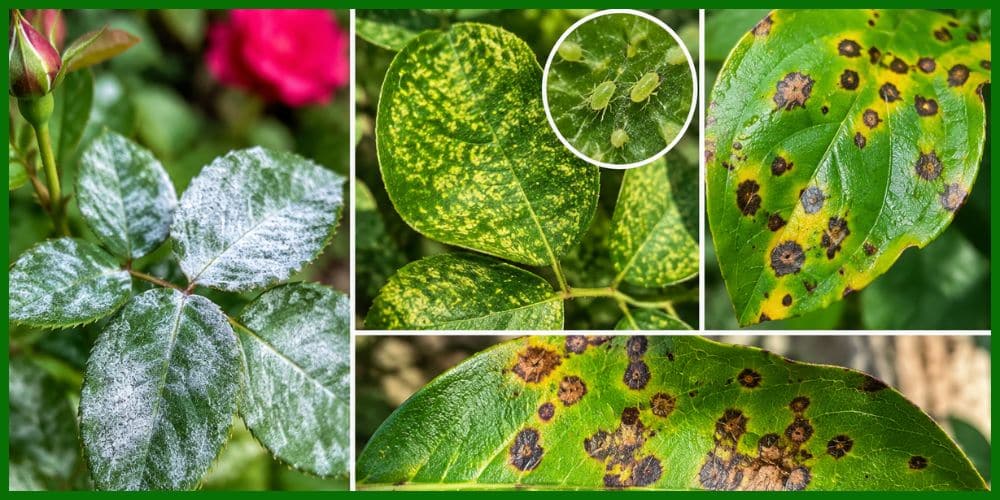
Different types of spots tell different stories. Yellow spots or a stippled appearance usually point to aphids or spider mites feeding on the underside of the leaves. Gray or white powdery coating on the surface of leaves, buds, and stems is powdery mildew, a fungal disease that spreads fast and can significantly weaken the plant if left untreated. Small dark or brown spots with yellow rings around them may indicate leaf spot disease or a bacterial infection.
Clemson University’s Home and Garden Information Center notes that powdery mildew begins as small circular white spots that expand and join together as the infection progresses, spreading through wind and splashing rain to other parts of the plant and to nearby vegetation. Any of these conditions is treatable if caught early.
6. Roots Protruding from Drainage Holes or Smelling Foul
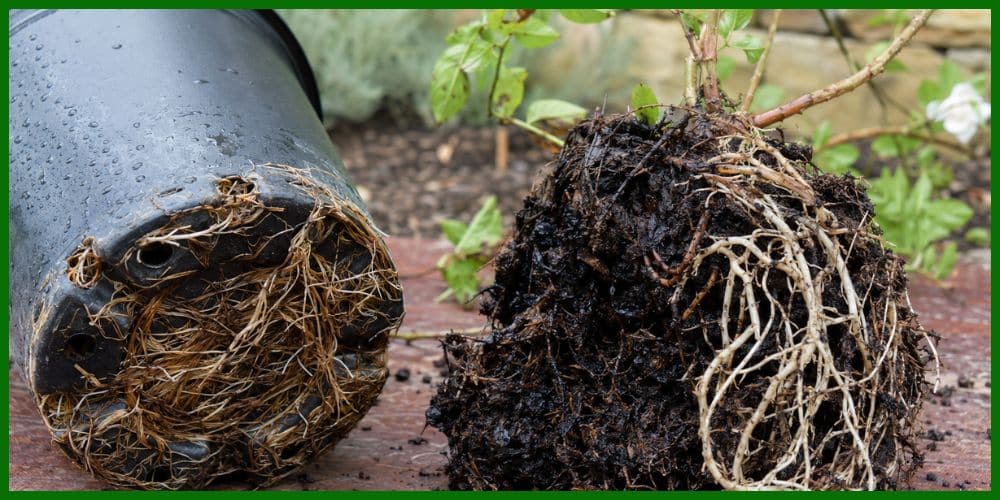
Check the drainage holes of any container plant. If roots are visibly pushing out of the bottom, the plant is severely pot-bound and its health will deteriorate fast without a larger container. On the other hand, if you remove the plant from its pot and the roots smell rotten, are dark brown or black, and feel mushy, you are dealing with root rot.
Penn State Extension explains that excess soil moisture eliminates the oxygen roots need to survive and simultaneously creates the exact conditions that allow soil pathogens like Phytophthora to infect and destroy the root system. Healthy roots should be light-colored, firm, and have little to no odor.
7. Stunted or Stopped Growth During Active Season
If your plant is not putting out new leaves, flowers, or any new growth during spring or summer when it should be actively growing, something is suppressing it. This could be nutrient deficiency, compacted roots, pest pressure under the soil, or simply the wrong growing conditions. A plant that should be blooming but produces no flowers at all is quietly showing you it is under serious stress.
8. Mold, Mushrooms, or Unusual Soil Smells

Mushrooms popping up near the base of your plant mean the soil is holding too much moisture. A sour or mildewy smell coming from the soil almost always signals root rot or fungal activity underground. These are not automatically death sentences, but they need to be addressed quickly before they spread further.
Can You Revive a Dead Plant?
Yes, in many cases, you can revive a plant that looks dead, as long as some living tissue remains in the stems or roots. A plant with even one green section on the stem or a few healthy roots still has a real chance of coming back with the right care. The only situation where revival is truly impossible is when every part of the plant, leaves, stems, and roots, is completely dead with no moisture, no green, and no flexibility anywhere. Before you give up, run the tests described above. You may be surprised by what is still alive.
How to Revive a Dead Plant
The most important thing to remember is not to make dramatic changes all at once. Shock is one of the fastest ways to finish off a struggling plant. Make changes gradually, monitor the response, and keep going if you see improvement.
Step 1: Remove All Dead Material First
Start by cutting away any dead or dying leaves, stems, and branches. Use clean, sterile scissors or pruning shears so you do not introduce more bacteria or fungus into open wounds. Removing dead tissue does two things. It stops the plant from wasting energy on parts it cannot save, and it encourages the plant to redirect that energy toward new growth. Do not be afraid to cut back significantly. If there is green at the base, the plant can come back.
Also, deadhead any dried flowers or buds. These put enormous metabolic strain on a struggling plant, and removing them immediately takes that burden away.
Step 2: Examine and Address the Roots
Unpot your plant and look carefully at the root system. If roots are mushy, dark, and smelly, you have root rot. Trim all the rotted roots back to healthy tissue using sterile scissors, then repot into fresh, well-draining soil. If the roots are dry and shrunken but not rotted, the plant is severely dehydrated. Soak the root ball in room temperature water for 20 to 30 minutes, then repot and maintain regular, gentle watering going forward.
If the roots are heavily pot-bound with barely any soil visible, it is time to move up to a pot two inches wider and two inches deeper than the current one.
Step 3: Fix Your Watering
Most plants die from either too much or too little water, and the fix for each is the opposite. Learn to test soil moisture with your finger rather than watering on a fixed schedule. Push your finger about an inch into the soil. If it is damp, wait. If it is dry, water thoroughly.
One of the most overlooked causes of plant decline is overwatering, which people often confuse with underwatering because the symptoms look very similar on the surface. For a deeper understanding of what overwatering does to plants at every stage, read our full guide on the signs of overwatering plants.
Switching to distilled or filtered water can also make a notable difference for sensitive plants or those growing in containers, as tap water chemicals can stress roots over time.
Step 4: Adjust Light and Temperature
A plant suddenly placed in too much direct sun will scorch. One that has been sitting in low light too long will slowly fade and weaken. Research the specific light needs of your plant and make adjustments gradually. Do not move a plant from deep shade to full sun in one day. Shift it incrementally over a week or two and watch how it responds at each stage.
Also check for cold drafts from windows, air conditioning vents, or gaps in doors. Temperature stress is an underestimated killer, especially for tropical houseplants that are used to stable warm conditions.
Step 5: Fertilize Carefully
If the plant has some life left in it but growth is stunted or the leaves are pale and dull, fertilizing can help. However, never fertilize a plant that is severely stressed, root-rotted, or completely dried out. Fertilizing a dying plant often makes things worse by burning already fragile roots. Wait until you see at least some signs of recovery first, then introduce a balanced, diluted fertilizer.
For outdoor plants and garden beds, timing your fertilization correctly makes a significant difference. Our guide on when to fertilize your lawn in spring covers the seasonal timing principles that apply broadly to outdoor plant feeding as well.
Step 6: Treat for Pests and Fungus
If you identified insects, mildew, or fungal spots, treat them directly. For aphids, spider mites, and most soft-bodied insects, an insecticidal soap spray works well and is gentle on the plant. For powdery mildew, apply a sulfur-based fungicide at the very first sign of the white powdery coating. Early treatment stops the fungus from spreading to the rest of the plant and to nearby plants in your garden.
South Dakota State University Extension recommends treating powdery mildew as soon as it appears, as early intervention is the most effective way to prevent it from becoming a serious problem.
Ladybugs introduced to an outdoor garden will naturally reduce aphid populations without any chemicals. Always use the gentlest effective treatment first. Strong pesticides on a plant that is already stressed can sometimes do more harm than the pest itself.
Step 7: Increase Humidity if Needed
Dry air causes browning leaf tips, curling, and overall weakening of many tropical and subtropical plants. If you live in a dry climate or are keeping plants indoors through winter with the heating running, consider misting the leaves lightly a few times a week. A tray of pebbles filled with water placed under the pot raises the ambient humidity around the plant without adding water directly to the roots.
When a Plant is Truly Beyond Saving
Sometimes a plant is genuinely dead. If the scratch test reveals no green anywhere from tip to base, the roots are completely rotted or dried to a crisp with no healthy tissue remaining, and there has been no response to any care changes over several weeks, it is time to let go.
That is not failure. That is gardening. Knowing when to replace a plant and start fresh is just as important as knowing how to revive one.
Final Word
The gap between a dying plant and a dead one is often wider than it looks. Most plants send out distress signals well before they reach the point of no return, and most of those signals can be answered with the right attention, whether that is adjusted watering, better light, cleared-out root rot, or proper pest treatment.
Check the leaves, test the stems, inspect the roots. Then make small, measured changes and watch what happens. More often than you would expect, you will be surprised by what comes back.
If you need expert support with plant care, fungicide treatment, pest management, or overall lawn and garden health, the team at The Works Lawn Service is here to help. Contact us today to keep your garden thriving all year long.