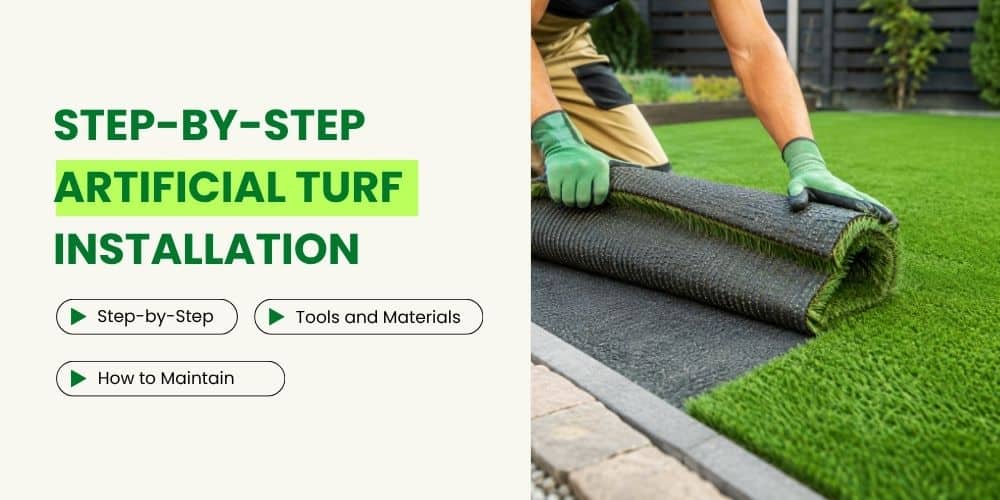
Installing artificial turf is one of the best ways to enjoy a green, low-maintenance lawn without the constant watering, mowing, and upkeep required by natural grass. However, long-term performance depends just as much on proper installation as the quality of the turf itself. A well-prepared base, effective drainage, and correct installation techniques help create a lawn that looks natural, performs reliably, and lasts for many years.
In this guide, you’ll learn how to install artificial turf step by step, choose the right base material, prepare the site correctly, avoid common installation mistakes, and decide whether a DIY or professional installation is the right option for your project.
If you’re comparing synthetic turf with a traditional lawn, our guide on How to Make Grass Greener: 9 Simple Tips explains how to improve natural grass before deciding which option is best for your property.
What Is Artificial Turf?
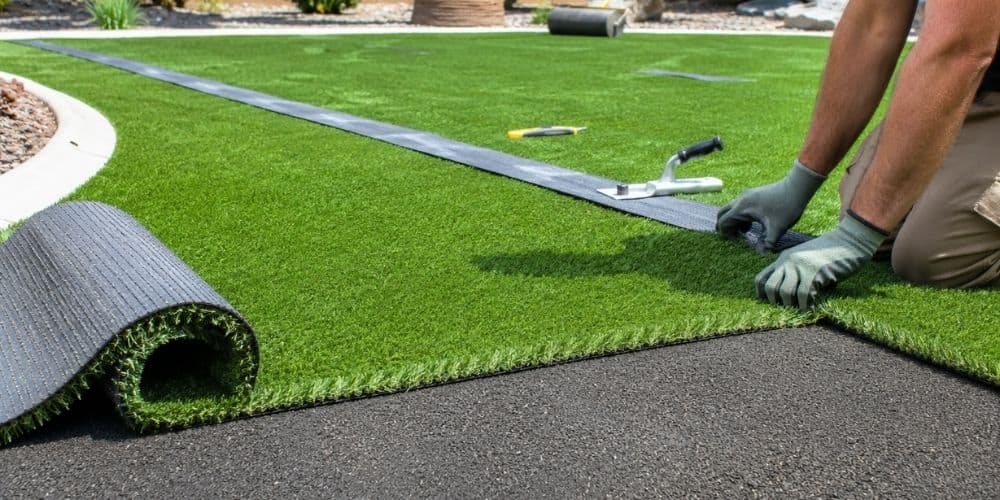
Artificial turf is a synthetic grass surface designed to replicate the appearance and feel of natural grass while requiring far less maintenance. Made from durable, UV-resistant fibers, modern artificial turf stays green year-round without regular mowing, watering, fertilizing, or reseeding.
Unlike natural grass, artificial turf provides a consistently attractive lawn with only occasional cleaning and brushing. However, its long-term performance depends heavily on proper installation. A well-prepared base, effective drainage, and correct installation techniques help create a lawn that remains level, drains efficiently, and lasts for many years.
Benefits:
- Requires little to no ongoing lawn maintenance
- Saves water by eliminating regular irrigation
- Stays green throughout the year
- Resists heavy foot traffic and changing weather conditions
- Provides a durable, pet- and family-friendly surface
- Can last 15–20 years or longer with proper installation, quality materials, and routine maintenance.
Artificial Turf vs. Natural Grass
| Feature | Artificial Turf | Natural Grass |
| Watering | Rarely required | Regular watering |
| Mowing | Not required | Weekly or bi-weekly |
| Fertilizer | Not required | Required seasonally |
| Weed Control | Minimal | Regular treatments |
| Appearance | Green year-round | Can turn brown or patchy |
| Maintenance | Low | High |
| Mud After Rain | No | Yes |
| Lifespan | 15–20 years (with proper care) | Requires ongoing maintenance |
Tools and Materials You’ll Need
Before installing synthetic turf, gather all the necessary tools and materials. Having everything ready before you begin helps the project progress efficiently and minimizes interruptions.
| Tools | Materials |
| Measuring tape | Artificial turf |
| Utility knife | Crushed granite or road base |
| Shovel | Landscape fabric (weed barrier) |
| Garden rake | Joining tape |
| Wheelbarrow | Turf adhesive |
| Plate compactor | Turf nails or landscape spikes |
| Hand tamper | Infill material |
Depending on the size of the project, additional equipment such as a sod cutter or power broom may make the installation process easier and more efficient.
Choosing the Right Base Material for Artificial Turf
The base material forms the foundation of your artificial turf installation and plays a major role in drainage, stability, and long-term durability. Selecting the right material helps prevent uneven settling, improves water drainage, and creates a firm surface that can withstand years of foot traffic. The best option depends on your soil type, drainage conditions, and how the area will be used.
- Crushed Granite: One of the most popular choices because it compacts well while allowing excellent drainage. It works well for most residential landscapes.
- Road Base (Class II Road Base): A blend of crushed stone and fines that creates a strong, stable foundation, making it ideal for driveways, commercial spaces, and high-traffic areas.
- Decomposed Granite: Provides good drainage and compacts into a smooth surface. It is commonly used for residential lawns and decorative landscape projects.
- Crushed Limestone: Offers excellent stability and long-term durability while maintaining good drainage. It performs well in a variety of soil conditions.
Regardless of the material you choose, spreading it evenly, grading it correctly, and compacting it thoroughly are essential steps for creating a smooth, long-lasting artificial turf installation. Avoid using loose sand or topsoil as the primary base material, as they do not provide the stability required for a long-lasting artificial turf installation.
Steps for Installing Artificial Grass and Turf
Installing synthetic grass is a multi-step process that requires careful preparation and attention to detail. While every project is unique, following the correct sequence helps ensure your new lawn remains level, drains properly, and withstands years of daily use.
Below is a detailed guide explaining how to install artificial turf like a professional.
Step 1: Measure and Plan the Installation Area
Sketch a simple layout before ordering materials. Planning seam locations and turf direction in advance helps reduce waste and creates a more natural-looking installation.
Every successful installation begins with careful planning. Measure the area accurately to calculate how much turf, base material, and infill you’ll need. While measuring, identify trees, irrigation lines, walkways, and other landscape features that may affect the installation.
Planning ahead also allows you to position seams in less noticeable locations and ensure all turf pieces will face the same direction, creating a more natural appearance. It’s also a good time to contact your local utility provider before excavation to identify any buried utility lines that could be affected during installation.
Step 2: Prepare the Ground by Removing Existing Grass
A clean foundation is essential for a long-lasting installation. Remove natural grass, weeds, roots, rocks, and other debris before installing the base material. Leaving organic material beneath the turf can cause uneven areas as it decomposes over time.
Once the area is cleared, inspect the soil for soft spots, drainage issues, or tree roots that may affect the stability of the finished installation.
Step 3: Excavate the Site for a Stable Foundation
Excavation creates space for the base material that supports the turf. Remove enough soil to accommodate the compacted base while maintaining a slight slope for proper drainage.
If your property has clay soil or poor drainage, this is also the stage to address those issues before moving forward with the installation.
Step 4: Install Landscape Edging
Before building the base, install landscape edging around the perimeter of the project. Edging helps define the shape of the lawn, prevents the base material from shifting, and creates a clean, finished appearance once the turf is installed.
Depending on your landscape design, you can use composite edging, bender board, steel edging, treated timber, or pavers. Secure the edging firmly with stakes so it remains stable during and after installation.
Step 5: Build and Compact the Artificial Turf Base
A strong base is one of the most important parts of a successful artificial turf installation. Most projects use crushed granite, decomposed granite, crushed limestone, or Class II road base because these materials compact well while allowing water to drain efficiently. Spread the base evenly across the area before compacting it.
Use a plate compactor to compress the aggregate into a firm, stable foundation. Check the surface carefully for low or high spots and make adjustments where needed. A properly compacted base helps prevent settling, improves drainage, and creates a smoother finished lawn. Compact the base in multiple passes rather than a single pass to achieve a more consistent and stable foundation.
Step 6: Install a Weed Barrier
Although artificial turf significantly reduces weed growth, installing a weed barrier adds another layer of protection. It helps prevent weeds from growing through the drainage holes while keeping the base material separated from the surrounding soil.
Roll the landscape fabric over the compacted base, overlap the edges slightly, and secure it with landscape staples. This simple step helps reduce future maintenance and minimizes unwanted weed growth.
Step 7: Lay and Position the Artificial Turf
Once the base has been prepared, carefully roll out the artificial turf over the installation area. Allow the turf to acclimate for 30–60 minutes after unrolling. This helps relax the backing, making trimming and seam alignment easier.
Before making any cuts, check that the turf is positioned correctly and that all pieces face the same direction. Keeping a consistent grain direction creates a more natural-looking lawn.
Step 8: Trim and Join the Artificial Turf
Always install every roll of turf with the grass blades facing the same direction. If the grain changes between sections, the finished lawn may appear to have different shades of green, even when the same product is used. After positioning the turf, trim the edges to match the shape of your landscape. Use a sharp utility knife and make clean, controlled cuts from the back of the turf for better accuracy.
If your project requires multiple pieces of turf, join them carefully using seam tape and turf adhesive. Carefully aligned seams become far less noticeable after brushing the fibers and applying infill, giving the lawn a cleaner, more natural appearance.
Step 9: Stretch, Secure, and Fasten the Artificial Turf
Before permanently fastening the turf, stretch it gently using a carpet kicker or turf puller to remove wrinkles and create a smooth surface. Once the turf is positioned correctly, secure the artificial turf around the perimeter with galvanized landscape nails or turf spikes placed according to the manufacturer’s recommendations and project requirements. Properly securing the edges helps prevent movement and keeps the installation looking neat over time.
Step 10: Apply Infill and Finish the Installation
The final step is adding infill. Infill helps support the grass blades, improves durability, and gives the turf a more natural appearance.
Silica sand or acrylic-coated infill is commonly used because it helps keep the grass blades upright and protects the backing from UV exposure.
Once the infill has been spread, use a stiff broom or power broom to work it evenly into the turf fibers. Finally, inspect the lawn for visible seams, loose edges, or uneven areas before completing the installation. Walking across the entire surface after installation is a simple way to identify uneven areas that may require additional infill or minor adjustments before the project is complete.
Popular Uses for Artificial Turf Grass
One of the biggest advantages of artificial turf is its versatility. It can be installed in areas where natural grass is difficult to maintain while adding year-round greenery with minimal upkeep. Whether you’re upgrading a residential or commercial landscape, synthetic turf offers endless design possibilities.
- Backyards: Create a clean, durable lawn for family gatherings, pets, and outdoor activities. Artificial turf creates a clean, durable lawn that’s perfect for outdoor gatherings, children’s play areas, and pet-friendly spaces.
- Patios and Outdoor Living Spaces: Add a soft, green accent around patios, pergolas, and seating areas for a more inviting atmosphere. Installing turf around patios, pergolas, and outdoor kitchens softens hardscape features while creating a greener appearance.
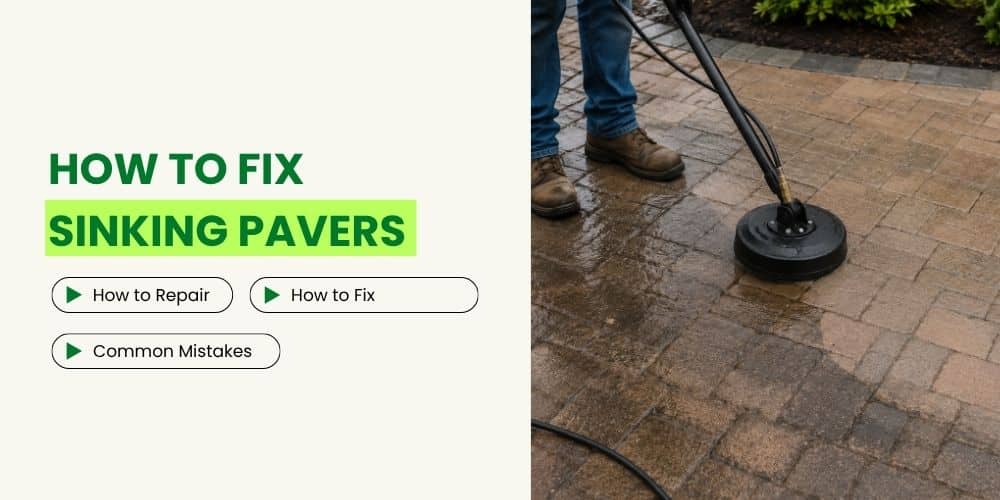
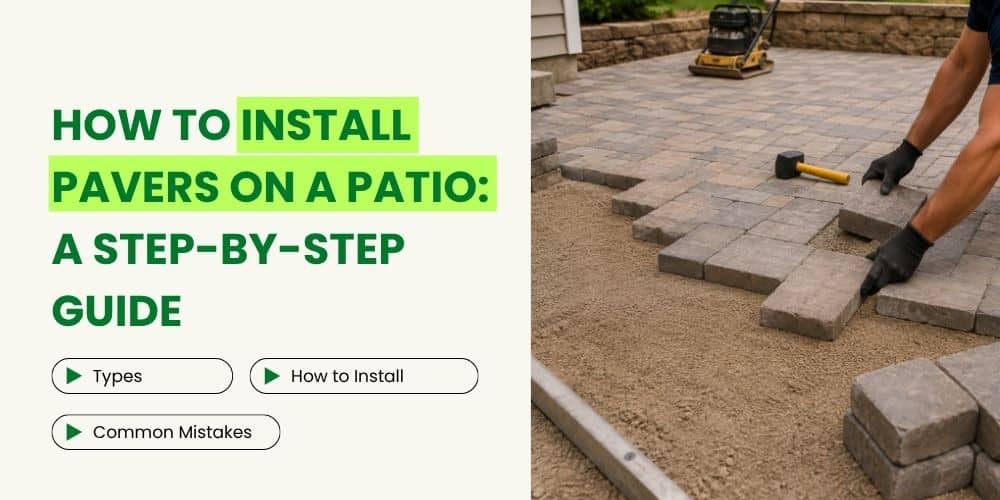
Pairing synthetic turf with pavers creates a seamless outdoor living space. Learn more in our guide on How to Seal Pavers the Right Way to keep your hardscape looking its best.
- Walkways and Garden Paths: Enhance pathways by installing turf between stepping stones or alongside walkways.
Pool Areas: Enjoy a mud-free, low-maintenance surface that stays attractive around swimming pools. - Play Areas and Pet Zones: Provide a comfortable, durable surface that’s ideal for children and pets.
- Balconies and Rooftops: Bring the look of natural grass to outdoor spaces where traditional lawns aren’t practical.
Common Artificial Turf Installation Mistakes to Avoid
Even premium artificial turf can develop problems if it’s installed incorrectly. Understanding the most common installation mistakes helps ensure your new lawn remains attractive and performs well for years.
Skipping Proper Excavation
Installing turf directly over existing grass or removing too little soil often leads to uneven settling as organic material decomposes beneath the surface. Excavating to the proper depth creates room for a stable base and improves drainage.
Using a Poorly Compacted Base
The base supports the entire installation. If it isn’t compacted thoroughly, the turf may develop dips, wrinkles, or soft areas over time. Compacting each layer properly creates a firm foundation that resists settling.
Ignoring Drainage
Artificial turf drains through its backing, but the base beneath it must also allow water to move away efficiently. Failing to create adequate drainage can result in standing water after heavy rainfall.
Applying Too Little Infill
Applying too little infill can cause grass fibers to flatten more quickly and reduce the overall lifespan of the turf. Using the correct amount helps support the blades, protects the backing, and creates a more natural appearance.
Installing Turf with Different Grain Directions
Every roll of artificial turf has a natural grain. Installing adjacent pieces in different directions can make sections appear to be different colors. Always align the turf so every roll faces the same direction.
Rushing the Finishing Process
Cutting the turf too quickly, applying uneven infill, or failing to secure the perimeter properly can affect both the appearance and lifespan of the installation. Taking extra time during the finishing stages helps produce cleaner seams, better stability, and a more professional result.
DIY vs. Professional Installation
Installing artificial turf yourself can be a good option for small, straightforward projects. However, larger landscapes or properties with grading and drainage challenges often benefit from professional expertise.
| DIY Installation | Professional Installation |
| Lower upfront cost | Expert site preparation |
| Suitable for smaller projects | Proper grading and drainage |
| Requires tool rental | Professional equipment included |
| More time and physical effort | Faster installation |
| Learning curve for beginners | Consistent, long-lasting results |
Although DIY installation can reduce upfront costs, correcting grading, drainage, or seam issues after installation is often more expensive than doing the work properly the first time. If you’re unsure about excavation, drainage, or seam installation, working with experienced professionals can help ensure the project is completed correctly the first time.
If you’re still deciding between artificial turf and maintaining natural grass, our Summer Lawn Care Tips for Texas guide can help you compare the ongoing maintenance each option requires.
How to Maintain Artificial Turf After Installation
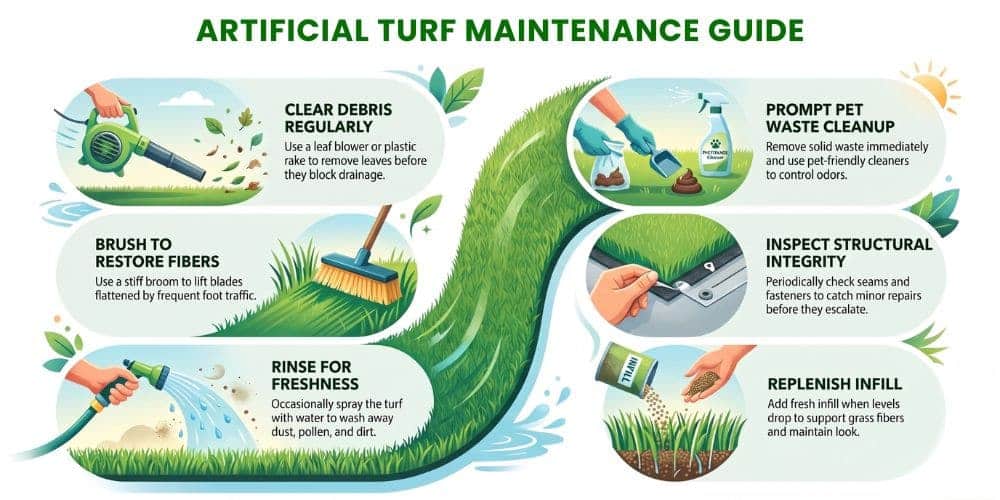
One of the biggest advantages of artificial turf is its minimal maintenance requirements. While it doesn’t need mowing or watering like natural grass, a little routine care will help keep it looking clean and performing at its best.
Remove Leaves and Debris
Use a leaf blower, plastic rake, or soft broom to remove leaves, twigs, and other debris before it builds up. Keeping the surface clean also helps maintain proper drainage.
Brush the Turf Regularly
Areas that receive frequent foot traffic may develop flattened fibers over time. Brush the turf against the direction of the grass fibers using a stiff broom or power broom to restore the blades to an upright position and maintain a natural appearance.
Rinse Occasionally
Dust, pollen, and dirt can accumulate on the surface. Rinsing the turf with water occasionally helps maintain its appearance and removes loose debris.
Clean Pet Areas Promptly
If pets use the lawn regularly, remove solid waste promptly and rinse the area as needed. Pet-friendly cleaners designed for synthetic grass can also help control odors.
Inspect Seams and Edges
Periodically check seams, edging, and fasteners to ensure everything remains secure. Addressing minor issues early can prevent larger repairs later.
Replenish Infill if Necessary
Over time, weather and foot traffic may reduce the amount of infill in some areas. Adding fresh infill when needed helps support the grass fibers and maintain the turf’s appearance.
With proper care, a quality artificial turf installation can continue looking attractive for many years.
Frequently Asked Questions
Can I install artificial turf over natural grass?
No. Existing grass, weeds, and organic material should be removed before installation. Installing turf directly over natural grass can lead to uneven surfaces, poor drainage, and decomposition beneath the turf.
What is the best base material for artificial turf?
Crushed granite, crushed limestone, decomposed granite, and road base are among the most commonly used materials because they compact well and provide excellent drainage.
Do I need a weed barrier?
A weed barrier is recommended for most residential installations. While it doesn’t eliminate weeds completely, it helps reduce weed growth beneath the turf and separates the base material from the surrounding soil.
Can artificial turf be installed on concrete?
Yes. Artificial turf can be installed over concrete if the surface is clean, stable, and has adequate drainage. Additional padding may be added to improve comfort.
How long does artificial turf last?
High-quality artificial turf typically lasts between 15 and 20 years, depending on the product, installation quality, climate, and level of foot traffic.
Does artificial turf require drainage?
Yes. Proper drainage is essential for preventing standing water and extending the life of the installation. A well-prepared base combined with the turf’s perforated backing allows water to drain efficiently.
Is artificial turf safe for children and pets?
Modern artificial turf products are generally manufactured using durable, non-toxic materials, making them suitable for family lawns, play areas, and pet spaces.
Can I install artificial turf myself?
Yes, many homeowners successfully complete DIY projects. However, proper excavation, base preparation, drainage, and seam installation require careful attention to detail. Large or complex projects are often best handled by experienced professionals.
Does artificial turf fade in the sun?
Quality artificial turf is manufactured with UV-resistant fibers that help maintain color for many years. Lower-quality products may fade more quickly under prolonged sun exposure.
Is artificial turf worth the investment?
For many homeowners and businesses, artificial turf provides excellent long-term value. Reduced maintenance, lower water usage, year-round curb appeal, and improved durability often offset the initial installation cost over time.
Does artificial turf get hot in summer?
Artificial turf can become warmer than natural grass during hot weather, especially in direct sunlight. Choosing lighter-colored infill, adding shade, or occasionally rinsing the surface with water can help reduce surface temperatures.
Conclusion
Installing artificial turf is an excellent way to create a beautiful, low-maintenance landscape that stays green throughout the year. With proper site preparation, a stable base, effective drainage, and careful installation, you can enjoy a durable lawn that performs well for many years.
If you’d rather leave the excavation, grading, and installation to experienced professionals, The Works Lawn Service provides expert artificial turf installation for residential and commercial properties throughout Round Rock and the surrounding communities. Our team delivers natural-looking, long-lasting artificial turf installations built on proper site preparation, expert craftsmanship, and attention to detail.