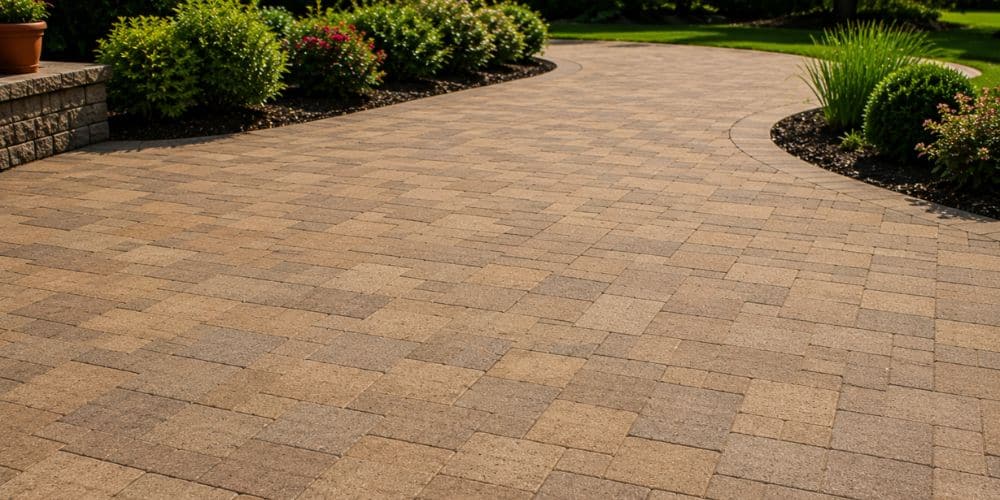
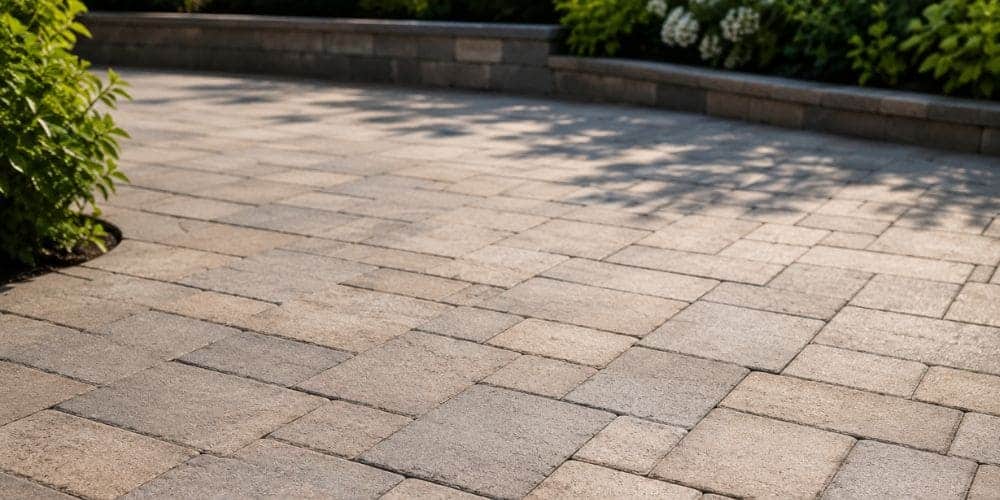
Whether you just installed a new paver patio or your driveway has been around for years, sealing your pavers is one of the smartest things you can do to protect your investment. Done right, it keeps colors vibrant, locks in joint sand, blocks stains before they set, and adds years to the life of your hardscape.
Done wrong, or skipped entirely, you end up with faded pavers, weed-filled joints, and stubborn stains that no amount of scrubbing will fix.
This is especially true for homeowners in regions like Texas, where pavers are constantly exposed to intense sun, heavy rain events, and seasonal soil movement. Proper sealing provides a crucial defense against fading, staining, and moisture-related damage while extending the life of your patios, walkways, and driveways.
This guide explains everything: how to choose the right sealer, a clear step-by-step sealing process, common mistakes and how to fix them, and honest advice on when to DIY versus calling a pro. No product pushing. Just the process that works.
Should You Even Seal Your Pavers?
Before you buy a single gallon of sealer, it is worth asking: Do your pavers actually need it?
The honest answer is it depends on the type of pavers you have, their current condition, and what you want out of them.
Pavers That Benefit Most From Sealing
- Concrete pavers: Highly porous and prone to color fade and staining. Sealing is strongly recommended.
- Brick pavers: Absorbent and vulnerable to moisture, moss, and oil stains. Benefit from a breathable sealer.
- Travertine and natural stone: Benefit from penetrating sealers that protect without altering the surface appearance. Film-forming sealers (the shiny type) should generally be avoided on natural stone.
Pavers That Usually Don’t Need Sealing:
Porcelain pavers: Extremely dense and non-porous. Sealing typically doesn’t penetrate or add value.
Signs Your Existing Pavers Are Ready for Sealing:
- Water soaks in instead of beading on the surface
- Colors look dull or noticeably faded
- Stains are setting in and becoming difficult to remove
- Joint sand is washing out, or weeds are coming up between pavers
- It has been more than 3 to 5 years since they were last sealed
Signs You Should Wait Before Sealing:
Brand new pavers need at least 60 to 90 days before sealing. New concrete pavers need time to cure, and a natural process called efflorescence (white salt deposits on the surface) needs to run its course and dissipate before sealing traps it underneath.
If you see visible efflorescence, a hazy white film on your pavers, do not seal over it. It will get locked in permanently.
If rain is in the forecast within 48 hours, wait.
How to Choose the Right Paver Sealer
This is where most guides let you down. “Water-based vs. solvent-based” is a start, but it does not help you make an actual decision. Here is the full picture.
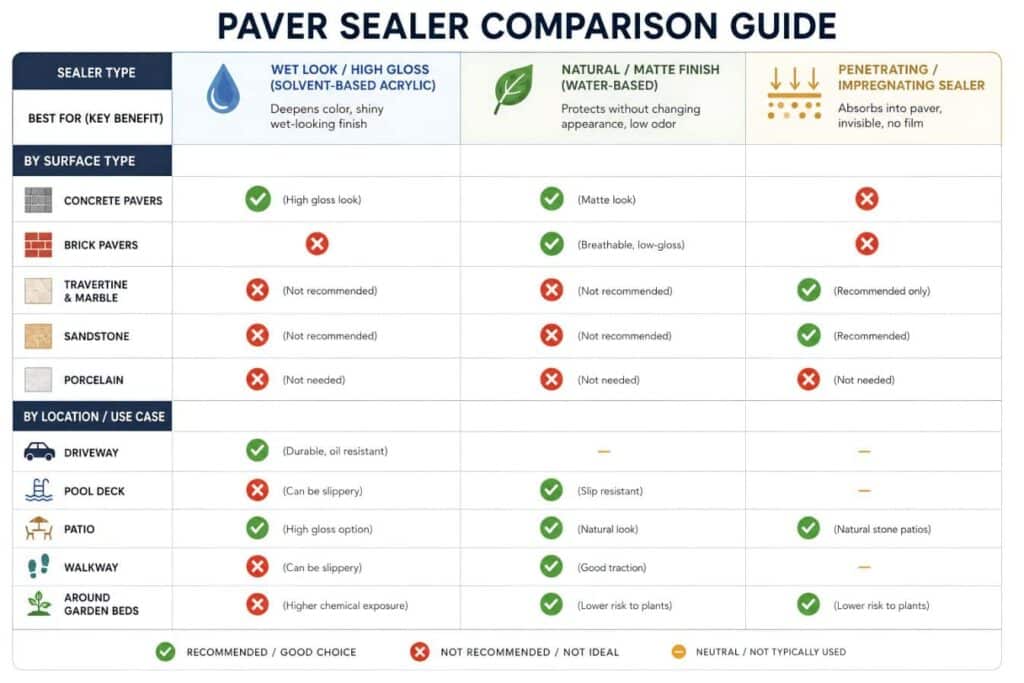
By Finish
Wet Look / High Gloss (Typically Solvent-Based Acrylic): Deepens and enhances color dramatically, creating a shiny, almost wet-looking surface. It is best for concrete paver driveways and patios where aesthetics are a priority. Note that it can be slippery when wet, so it is not ideal for pool decks.
Natural / Matte Finish (Typically Water-Based): Protects without changing the surface appearance. It is easier to apply and clean up, better for areas around pools and walkways, and has lower VOC content, so there is less odor.
Penetrating / Impregnating Sealer: It absorbs into the paver rather than forming a surface film. It is completely invisible with no sheen or color change. This is the right choice for travertine, marble, sandstone, and other natural stone. It is also the longest-lasting option, often 5 to 10 years.
By Surface Type
- Concrete pavers: acrylic sealer (water or solvent-based), wet look or matte
- Brick pavers: breathable water-based sealer, low-gloss
- Travertine and marble: penetrating impregnating sealer only, never film-forming
- Sandstone: penetrating sealer
- Porcelain: skip sealing, it is not needed
By Location and Use Case
- Driveway: solvent-based acrylic for durability and oil resistance
- Pool deck: water-based matte for slip resistance
- Patio: water-based or solvent-based, depending on your desired look
- Walkway: water-based matte
- Around garden beds: water-based to reduce chemical risk to plants
Cost Breakdown
- Water-based sealer: $80 to $150 per gallon, covers 100 to 150 sq ft per gallon
- Solvent-based sealer: $80 to $150 per gallon, covers 80 to 120 sq ft per gallon
- Penetrating sealer: $60 to $120 per gallon, covers 150 to 200 sq ft per gallon
For a standard 200 sq ft patio, budget $100 to $200 in sealer alone for a DIY job.
One important note: always buy from the same brand and product line if you are resealing over an existing application. Mixing sealer brands or types can cause peeling, cloudiness, or incompatibility. When in doubt, strip the old sealer first.
Tools and Materials You’ll Need for Paver Sealing
Gather everything before you start. Stopping mid-job to make a hardware store run is how mistakes happen.
For cleaning: a stiff-bristle broom or brush, garden hose or pressure washer, paver cleaner or degreaser (for oil and grime), efflorescence remover if you see white haze on the surface, and a block paving knife or narrow weeding tool to remove weeds from joints.
For joint repair: polymeric sand and a hand tamper or rubber mallet.
For sealing: your chosen paver sealer, a garden pump sprayer with an adjustable nozzle or a foam roller or short-pile roller, painter’s tape and plastic sheeting to protect edges and adjacent surfaces, and a flat piece of metal or cardboard to shield edges during spraying.
For safety: nitrile gloves, safety glasses, a respirator mask (essential for solvent-based sealers), and old shoes you do not mind ruining.
For a 200 sq ft patio, the total material cost typically runs $150 to $300, depending on the sealer type and whether you already own cleaning equipment.
How to Seal Pavers: Step-by-Step
Step 1: Wait the Right Amount of Time

If your pavers are brand new, stop here and wait. New concrete pavers need 60 to 90 days to fully cure and for efflorescence to dissipate. Sealing too soon traps moisture inside the concrete and leads to cloudiness, color distortion, and early sealer failure.
For existing pavers, move forward once the surface is clean and dry.
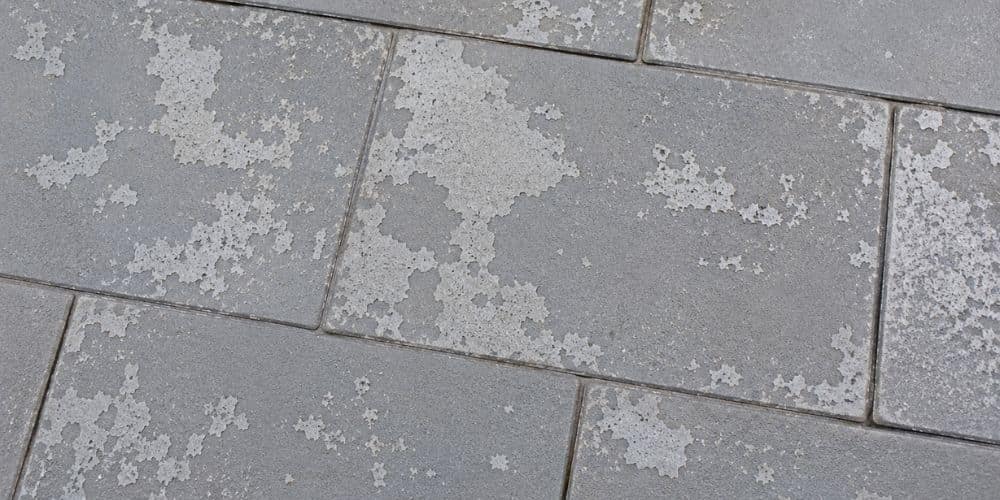
Step 2: Identify and Remove Efflorescence

Look for any chalky white patches on the surface. This is efflorescence, the mineral salts that migrated to the surface during the concrete curing process. If you see it, do not seal over it.
Apply a dedicated efflorescence cleaner. Let it dwell for 10 to 15 minutes, scrub with a stiff brush, and rinse thoroughly. This also mildly etches the paver surface, which helps the sealer adhere better.
Step 3: Clear the Area Completely
Remove all outdoor furniture, planters, and potted plants. Cover adjacent grass and garden beds with plastic sheeting because the paver sealer will damage plants if it gets on them. Apply painter’s tape along the edges of walls, steps, and any structures adjacent to the pavers.
Step 4: Clean the Pavers Thoroughly
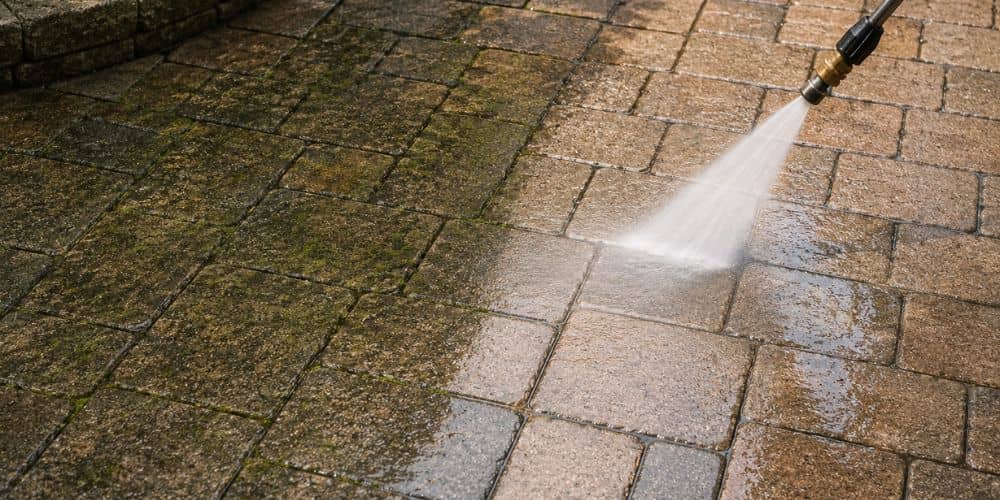
This is the single most important step. Sealer bonds to the paver surface. If dirt, oil, or debris is underneath it, you are sealing the problem permanently.
Use a block paving knife or narrow weeding tool to remove weeds from joints. Never use a wire brush because it leaves microscopic metal particles in the surface that will rust and appear as brown specks through the sealer later.
Sweep the entire surface to remove loose debris. Apply paver cleaner or degreaser to any stained areas, let it sit, then scrub.
Pressure wash using a fan nozzle at a 30-degree angle held about 12 inches from the surface. Never use a concentrated jet nozzle directly on pavers since it can etch the surface or blast out joint sand. Rinse thoroughly. If some joint sand washes out during cleaning, that is expected, and you will replace it in the next step.
Step 5: Refill the Joints with Polymeric Sand
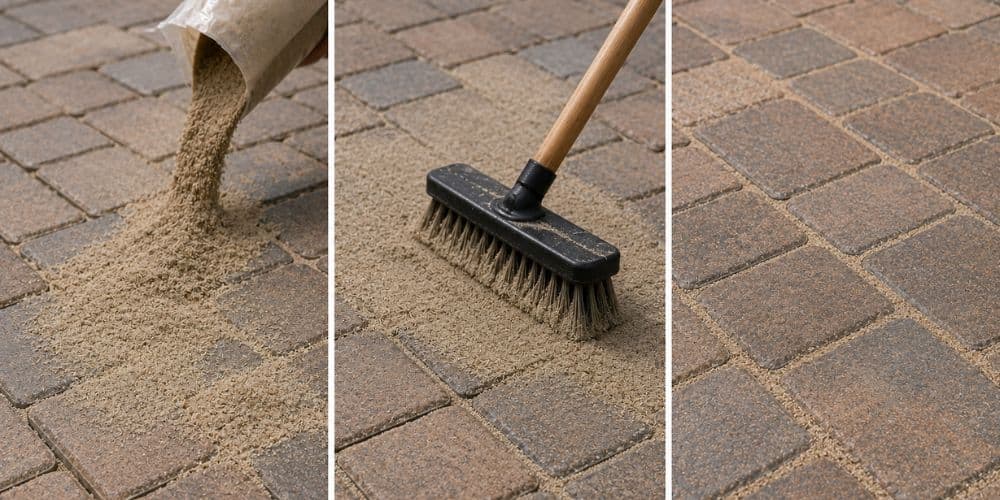
After cleaning, inspect all joints. Any missing, shallow, or loose joint sand should be replaced with polymeric sand before sealing.
Sweep polymeric sand into all joints using a stiff broom. Use a hand tamper or rubber mallet to compact it gently. Blow or sweep off any excess sand from the paver surface. Leftover sand on top of the pavers will get sealed in and look terrible. Follow the manufacturer’s instructions for activating the polymeric sand (typically, a light mist of water starts the hardening process).
Allow the polymeric sand to cure for at least 24 hours before sealing.
Step 6: Let the Pavers Dry Completely
This step is non-negotiable. Sealing over any moisture, even slight dampness, leads to white haze trapped under the sealer.
In warm sunny conditions, pavers typically dry within 24 hours after washing. In cooler or shaded conditions, wait 48 hours.
Use the plastic sheet test: tape a piece of clear plastic sheeting (about 18 inches by 18 inches) flat to the paver surface and leave it for 2 hours. If you see condensation on the underside when you lift it, the pavers are not dry enough. Wait another 12 to 24 hours and test again. This simple trick saves you from one of the most common and costly sealing mistakes.
Step 7: Check the Weather Forecast
You need 24 to 48 hours of dry weather before and after application.
The temperature should be between 50°F and 90°F. The sweet spot is around 70 to 75 degrees. Do not apply in direct intense sunlight. If the paver surface is too hot to touch comfortably, wait until morning or evening, as the heat causes the sealer to dry too quickly and streak. Also, keep automatic sprinkler systems off for at least 48 hours after application.
Step 8: Apply the First Coat of Sealer
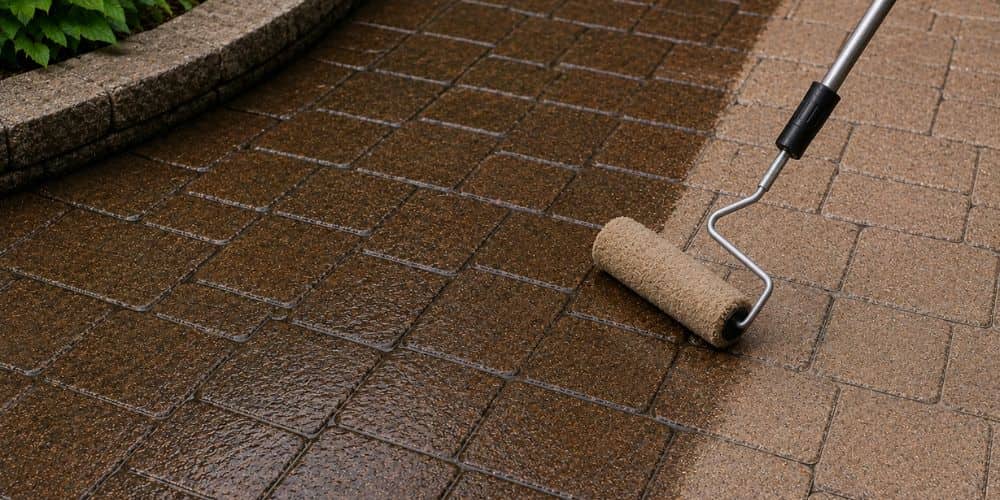
Read the product instructions before you open the container. Some sealers need to be stirred; others need to be shaken. Some require a specific application method.
Using a pump sprayer: hold the nozzle 12 to 18 inches above the surface and use slow, sweeping motions. Work in sections starting from the farthest corner and moving toward the exit so you never have to walk across fresh sealers. Immediately use a dry foam roller to spread any areas where sealer has pooled. Pooling creates thick spots, uneven sheen, and longer cure times. Protect adjacent walls by holding a flat piece of cardboard or sheet metal between the sprayer and anything you do not want sealed.
Using a foam roller: roll on a thin, even coat in one direction first, then lightly cross-roll. Avoid lifting and repositioning the roller mid-stroke, as this creates marks.
The most critical rule: do not stop mid-job. Once you start, finish the entire surface in one session. Stopping creates visible overlap marks where the first section partially cures before you return to it.
Step 9: Apply a Second Coat If Recommended
Most quality sealers perform better with two thin coats than one thick coat. Two coats mean better adhesion, more uniform sheen, and a longer-lasting result.
Wait for the first coat to become tack-free. Run a finger lightly across the surface. If it does not transfer to your finger, it is ready. This typically takes 1 to 2 hours in good conditions.
Apply the second coat in the opposite direction to the first for maximum coverage and uniformity.
Step 10: Allow Full Cure Time
- No foot traffic for at least 24 hours
- No vehicle traffic for a minimum of 48 to 72 hours
- No sprinklers for at least 48 hours
- Keep pets and children off the surface until fully cured
If unexpected rain arrives within the first few hours of application, water marks may appear. Wait for the sealer to fully cure and assess. Minor spots may blend in on their own. Severe cases may require stripping and reapplication.
6 Common Mistakes When Sealing Pavers and How to Fix Them
Even when homeowners follow most of the process correctly, a few common sealing mistakes can still lead to disappointing results. Understanding these issues before you begin can help you avoid costly repairs and rework later. This is the section every other guide skips. These are the most common problems people run into after sealing pavers, and exactly what to do about each one.
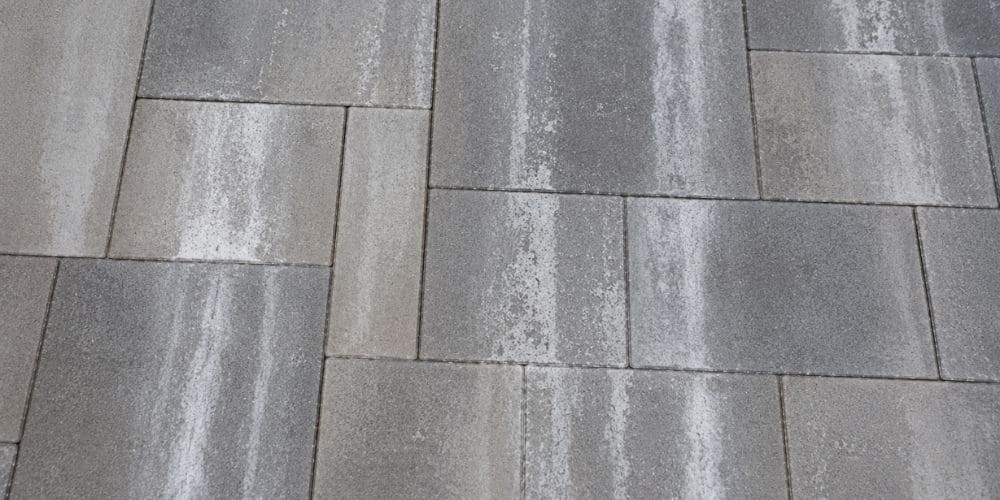
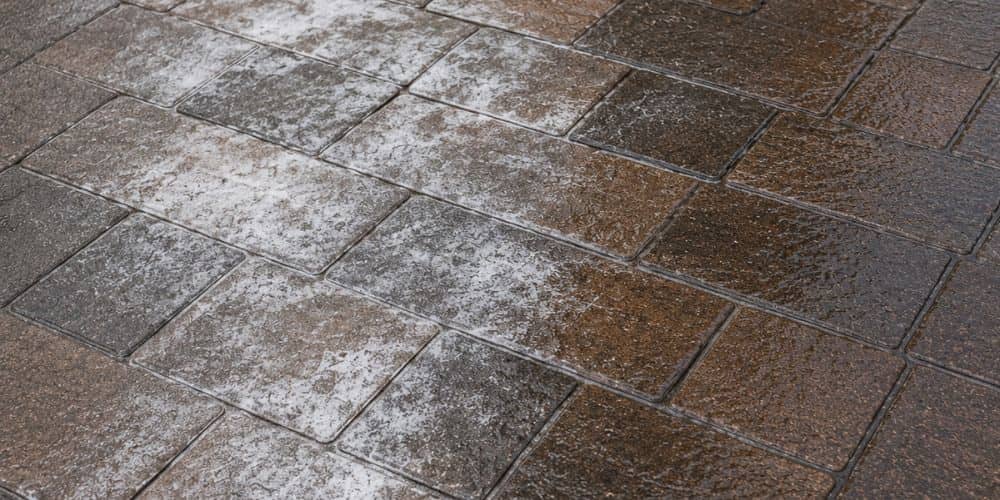
Mistake 1: White Haze or Cloudy Appearance
What it looks like: A milky white or gray haze covering areas of the sealed surface.
What caused it: Moisture was present in the pavers when the sealer was applied. The sealer trapped water vapor underneath, which could not escape and formed a cloudy film. This also happens when the sealer is applied too thickly.
How to fix it: Apply a xylene-based solvent to the affected area (available at hardware stores). Xylene dissolves acrylic sealers and allows the trapped moisture to escape. Let it sit, scrub gently, and reapply sealer once the area is completely dry. For water-based sealers, a dedicated sealer stripper product is more appropriate.
Prevention: Always use the plastic sheet moisture test before sealing. Never apply in cool, humid conditions or over damp pavers.
Mistake 2: Peeling or Flaking Sealer
What it looks like: The sealer is lifting off the surface in patches or sheets, usually visible within a few months.
What caused it: The new sealer was applied over an old, incompatible sealer, or over a surface that was not cleaned properly. Oil, dirt, or residue prevented proper bonding.
How to fix it: Strip the existing sealer completely with a dedicated sealer stripper, clean the raw surface again thoroughly, and reapply a fresh coat. There is no shortcut here.
Prevention: If you are resealing, always test a small area first and verify compatibility. When in doubt, strip before you reseal.
Mistake 3: Lap Marks and Streaks
What it looks like: Visible lines or uneven sheen where you started and stopped, or where the sprayer overlapped.
What caused it: You stopped partway through the job, and the first section partially cured before you continued. Or the sealer was applied in hot direct sunlight, where it dried too fast.
How to fix it: If the sealer is still wet, continue applying quickly to blend the marks. If cured, sand the affected areas lightly with fine sandpaper to break the sheen, then apply a thin new coat over the entire surface to unify the finish.
Prevention: Never stop mid-job. Work in the early morning when temperatures are cooler, and you have more working time.
Mistake 4: Sealer Applied Over Efflorescence
What it looks like: A permanent hazy white or grayish discoloration locked under the sealer surface.
What caused it: The pavers were sealed before efflorescence had fully cleared, trapping the mineral salts underneath.
How to fix it: This one is very difficult to reverse. The most reliable fix involves stripping the sealer, treating the raw surface with an efflorescence remover, letting the pavers fully clear over additional weeks, then resealing.
Prevention: Never seal within 60 to 90 days of new installation. If you see any white haze before sealing, treat it first.
Mistake 5: Weeds Return Within Weeks
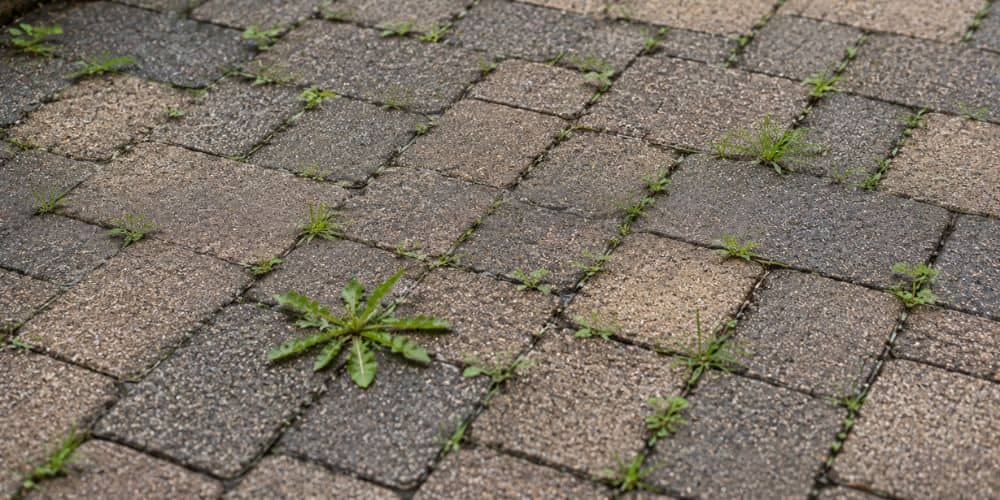
What it looks like: New weed growth pushing up through the joints shortly after sealing.
What caused it: Sealer alone does not prevent weeds. If the joints were not filled with properly compacted polymeric sand before sealing, seeds in the old joint material will still germinate.
How to fix it: Remove the weeds, refill the joints with polymeric sand, compact and activate it properly, then re-seal after the sand has cured.
Prevention: Always replace depleted joint sand with polymeric sand before sealing. Polymeric sand hardens when wet and resists weed growth and insect intrusion.
Mistake 6: Slippery Surface After Sealing
What it looks like: The pavers become dangerously slick when wet, particularly around pool areas or on slopes.
What caused it: A high-gloss or wet-look sealer was used in a location where slip resistance is critical.
How to fix it: An anti-slip aggregate additive can be broadcast onto a freshly applied wet coat. Alternatively, the high-gloss sealer can be stripped and replaced with a matte or penetrating sealer.
Prevention: Always use a matte water-based sealer or add an anti-slip additive around pools, on slopes, or in wet-climate applications.
How Long Does Paver Sealing Last and How to Maintain It
Resealing Frequency
Water-based acrylic sealers: Reseal every 2–3 years
Solvent-based acrylic sealers: Reseal every 3–5 years
Penetrating sealers (natural stone): Reseal every 5–10 years, or when the water-bead test fails
High foot traffic, vehicle use, intense UV exposure, and freeze-thaw climates all shorten the effective life of any sealer.
The Water-Bead Test
The simplest way to know if your pavers need resealing: pour a small amount of water on the surface. If it beads up and rolls off, the sealer is still working. If it soaks in, it is time to reseal.
Ongoing Maintenance Tips
- Rinse with a garden hose periodically to prevent surface buildup
- Clean spills quickly; sealed pavers resist staining but are not stain-proof. Oil, wine, and tannin stains from leaves can still penetrate over time if left untreated
- Avoid using harsh chemicals, bleach, or acidic cleaners on sealed pavers, as they degrade the sealer
- Limit pressure washing to once a year at most
- Reapply polymeric sand to any depleted joints before each resealing
- In freeze-thaw climates, avoid using rock salt or calcium chloride ice melt on sealed pavers; use sand for traction instead
Frequently Asked Questions
How long does it take to seal pavers?
Plan for a two-day project minimum. Day 1: clean, weed, refill joints, and let everything dry. Day 2: Apply sealer and begin cure time. Add another day of cure time before walking on the surface.
How long after polymeric sand can I seal pavers?
Wait at least 24 hours after activating polymeric sand before applying sealer. Some manufacturers recommend 48 hours. Check the product label.
Can you seal pavers in the rain?
No. You need 24 to 48 hours of dry weather before and after sealing. Rain on freshly applied sealer causes water marks, cloudiness, and adhesion failure.
Can you seal wet pavers?
No. Even slightly damp pavers will cause white haze under the sealer. Use the plastic sheet test to confirm dryness before you begin.
Should you seal pavers before or after polymeric sand?
Always apply polymeric sand first, let it fully cure, then seal. If you seal first, the sealer will prevent the polymeric sand from properly bonding to the joint walls.
What happens if you don’t seal pavers?
Unsealed pavers will fade over time due to UV exposure, become more susceptible to staining, allow weeds and ants to infiltrate joints, and suffer from joint sand erosion during heavy rain. They will not necessarily fall apart, but they will look and perform noticeably worse over time.
How do you seal pavers around a pool?
Use a water-based matte finish sealer and add an anti-slip aggregate to the mix before application. Never use a high-gloss or wet-look sealer near a pool because the surface becomes extremely slippery when wet.
Do you need to seal pavers every year?
No. Quality sealers last 2 to 5 years, depending on type and traffic. Resealing annually actually causes problems because sealer buildup becomes thick and can crack, peel, or yellow over time.
Can you seal old pavers?
Yes, as long as you clean them thoroughly first and address any structural issues, such as shifting, cracking, or efflorescence, before sealing. Old pavers in good structural condition can be sealed successfully.
What is the best temperature to seal pavers?
Between 50°F and 90°F, with 70 to 75 degrees being ideal. Avoid sealing in direct afternoon sunlight when paver surfaces can exceed 100 degrees, because the sealer dries too fast and streaks.
How much does professional paver sealing cost?
Professional paver sealing costs vary based on the size of the project, the condition of the pavers, and the type of sealer used. Larger driveways and restoration projects typically require more preparation and materials than smaller patios or walkways.
Final Thoughts
Sealing your pavers is not complicated, but it does require patience, proper prep, and the right conditions. The steps that most people skip, including waiting for efflorescence to clear, confirming the surface is bone dry, and filling joints before sealing, are exactly the steps that determine whether the job looks great for years or becomes a frustrating problem to fix.
Follow this process once, do it correctly, and your pavers will stay protected for the next three to five years.
And if you run into a problem like white haze, streaks, or peeling, now you know what caused it and how to fix it.
For homeowners in Round Rock and surrounding areas who want professional results without the guesswork, The Works Lawn Service provides expert paver sealing, restoration, and outdoor hardscape services designed to protect and enhance your investment for years to come.